Automated Notification
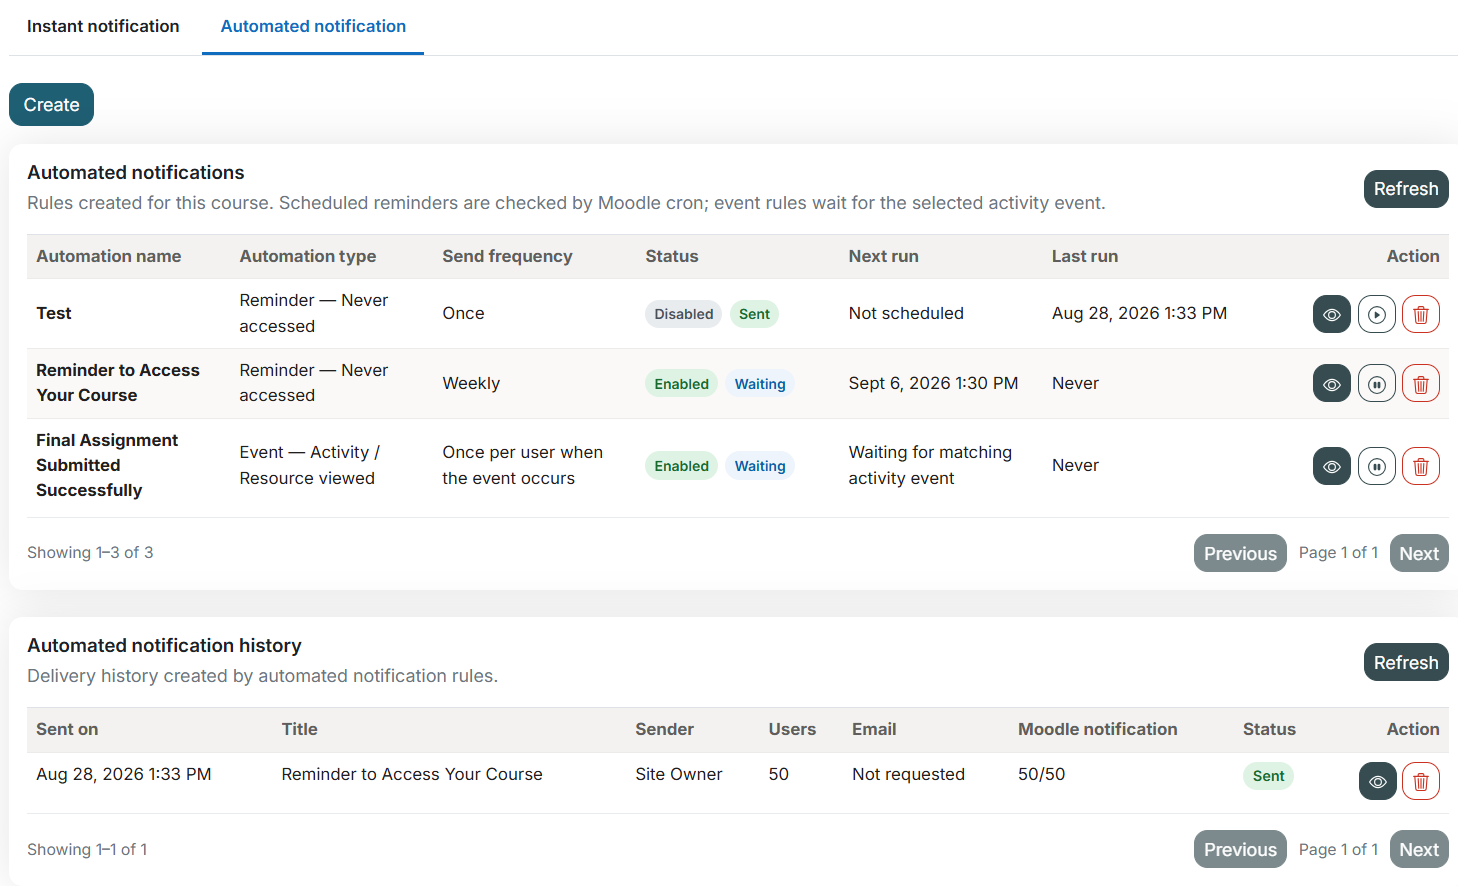
The Automated Notifications feature allows you to create messages that are automatically triggered on a specified date or when a particular course condition or event occurs.
Notifications can be delivered through:
- Moodle notifications, delivered through the Moodle website and mobile app when mobile notifications are configured.
Create an Automated Notification
Automated Notification Name

Enter a clear name for the automation. This name is used to identify and manage the automation in the Automated Notifications table.
Automation Type

Select the condition or event that will trigger the notification:
- Scheduled on a custom date: Sends the notification on a specified date.
- Reminder – Never accessed: Sends a reminder to users who have never accessed the course.
- Reminder – Progress: Sends a reminder based on the user’s course progress.
- Event – Activity or resource viewed: Sends the notification when a user views a specified activity or resource.
- Event – Activity submitted: Sends the notification when a user submits a specified activity.
Additional settings will appear according to the selected automation type. Complete the required conditions before preparing the message.
Prepare the Message
Start with a Template
You can select a predefined message template from the Start with a template section.

You can create a new template directly from this page or manage templates by navigating to:
Site administration → Plugins → Local plugins → Nice notification
Delivery Channels
Select one or both of the following delivery channels:
- Email: Sends the notification to recipients by email.
- Moodle notification: Sends the notification through the Moodle website and mobile app, when configured.

Message Details
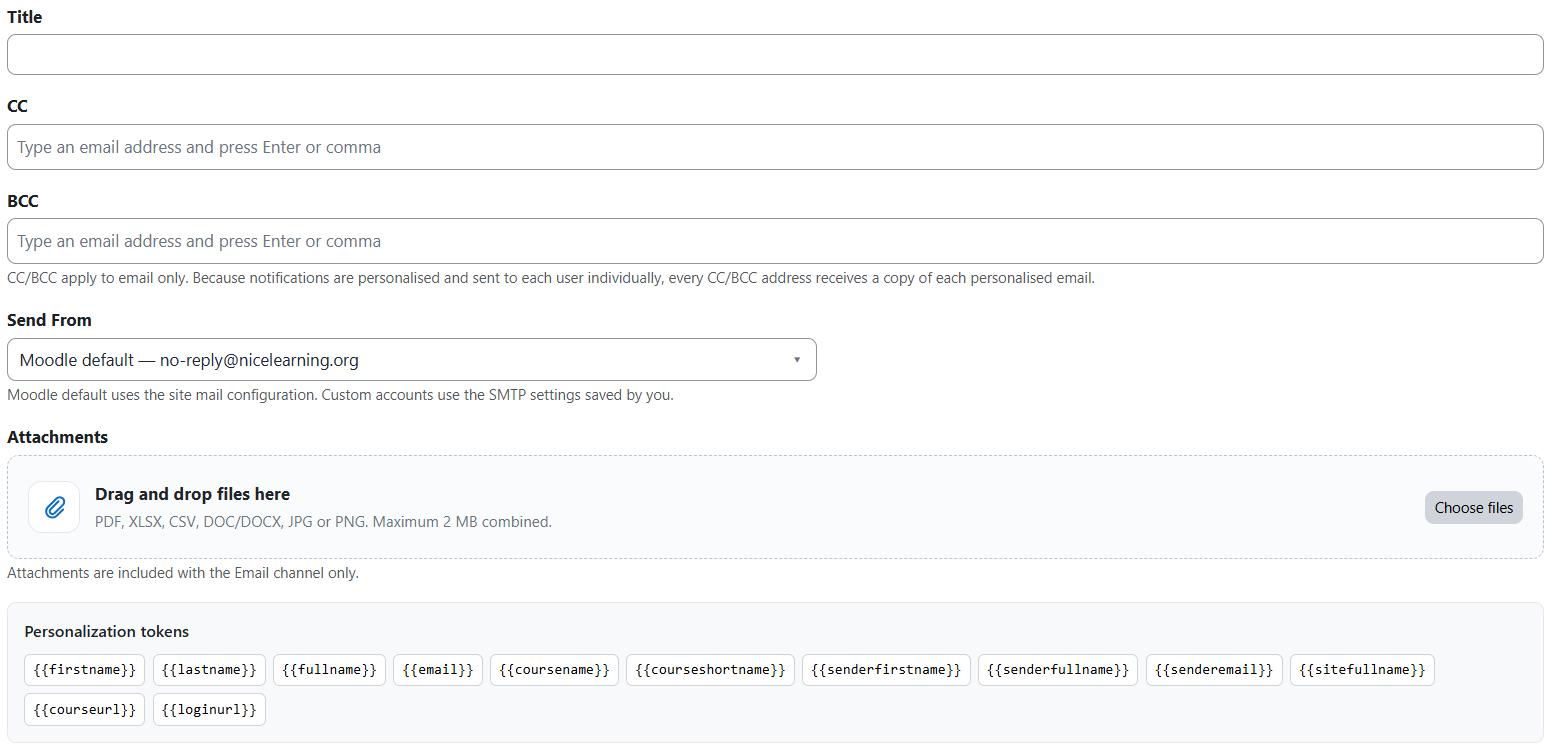
Complete the following fields:
- Title: Enter the notification title.
- CC: Add email addresses that should receive a copy of the message.
- BCC: Add email addresses that should receive a hidden copy of the message.
- Send From: Select the email address from which the notification will be sent. By default, the site’s Moodle email address is used.
- Attachments: Add files to the email notification, if required.
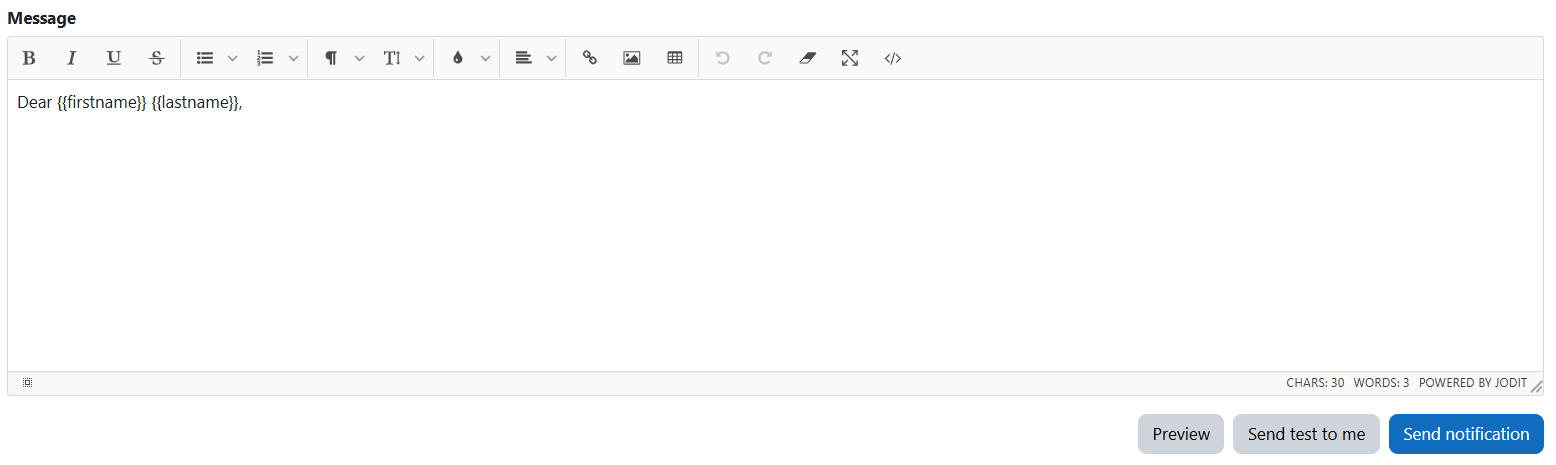
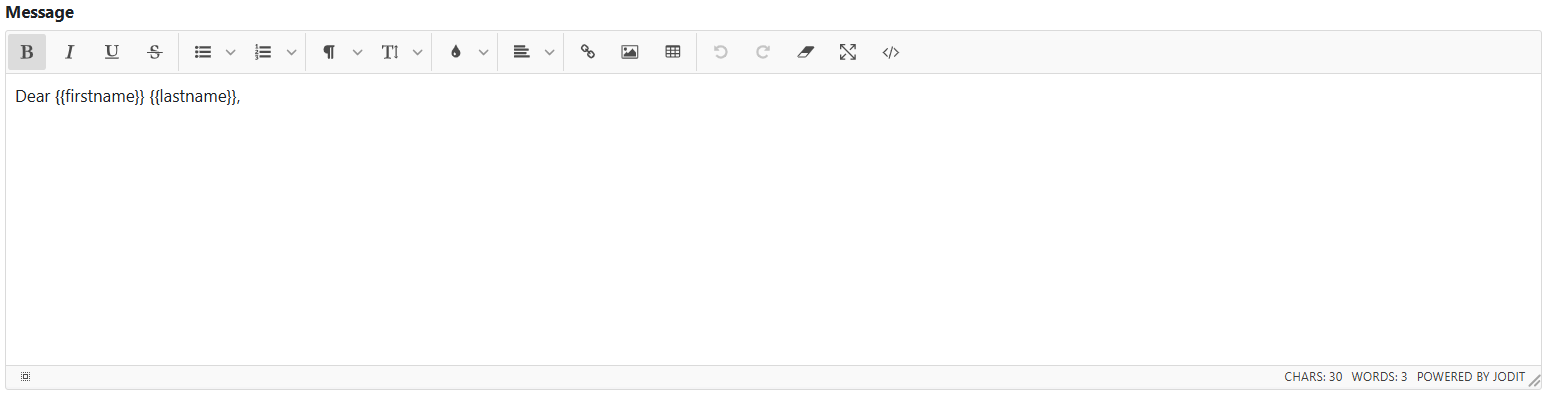
- Message: Create and format the notification using the rich-text editor.
Note: The CC, BCC, Send From, and Attachments options apply only when the Email delivery channel is enabled.
Additional sender email addresses can be created and managed by navigating to:
Site administration → Plugins → Local plugins → Nice notification
Attachments

The following file types are supported:
- XLSX
- CSV
- DOC
- DOCX
- JPG
- PNG
The maximum combined size of all attachments is 2 MB. Attachments are delivered by email only.
Personalization Tokens
Personalization tokens allow you to create dynamic messages based on recipient, sender, course, and site information.

The following tokens are available:
firstnamelastnamefullnameemailcoursenamecourseshortnamesenderfirstnamesenderfullnamesenderemailsitefullnamecourseurlloginurl
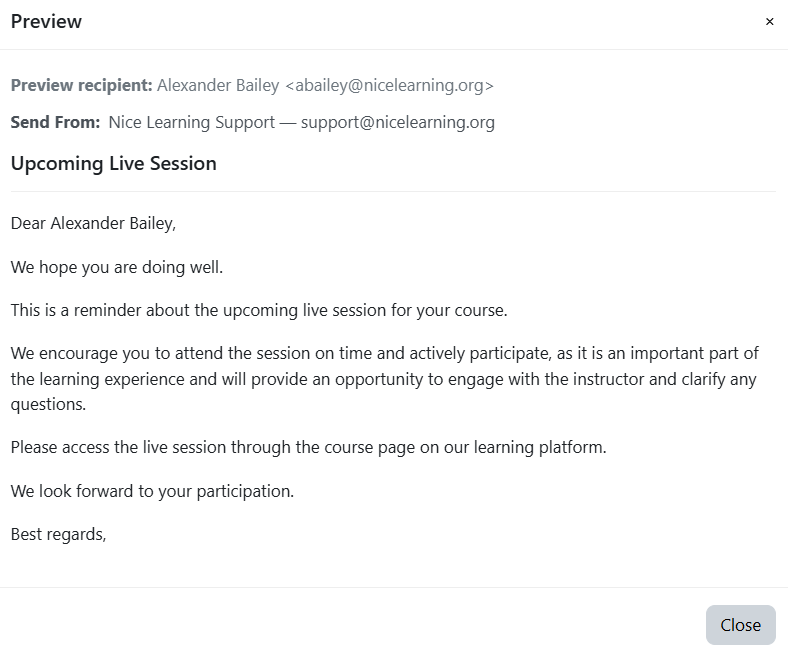
When the notification is sent, each token is automatically replaced with the corresponding information.
Use the rich-text editor to write and format your message. You can insert personalization tokens, tables, images, links, and other formatted content.
Preview
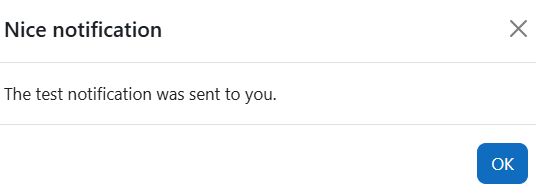
Send Test to Me
Save the Automated Notification
After completing the automation settings and preparing the message, click Save Automated Notification.
The automation will be saved and displayed in the Automated Notifications table, where it can be reviewed and managed.
Automated Notifications Table
The Automated Notifications table displays all notification rules created for the course.
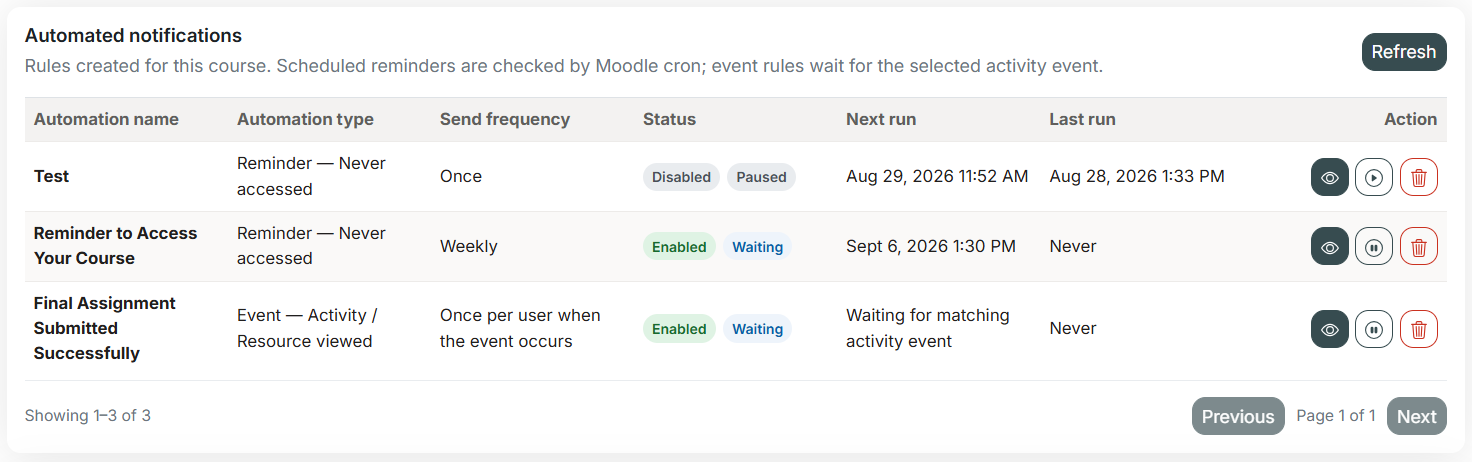
Scheduled notifications and reminders are processed by the Moodle cron, while event-based rules wait for the selected course activity or resource event to occur.
The following actions are available for each rule:
- View: Review the automation settings, trigger conditions, delivery channels, and message details.
- Start: Activate a stopped automation so that it can process future triggers.
- Stop: Pause an active automation without deleting it.
- Delete: Remove the automated notification rule.
Automated Notification History
The Automated Notification History table displays the delivery records created by automated notification rules.

Click View to access the complete delivery details, including:
Delivery Summary
Displays general information about the notification delivery, including its status, sending date and time, sender, number of recipients, and delivery channels.
Message Template
Displays the title and message content used when the automated notification was sent.
Recipient Delivery
Displays the delivery details for each recipient, including:
- Full name
- Email address
- Email delivery status, when the Email channel is enabled
- Moodle notification delivery status, when the Moodle notification channel is enabled
Was this page helpful?